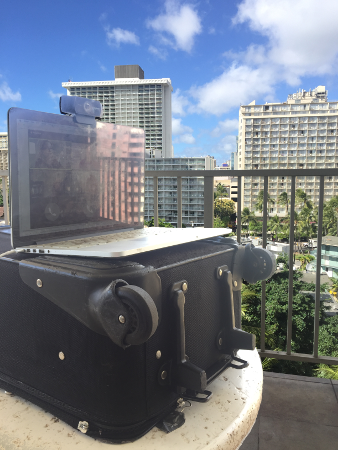
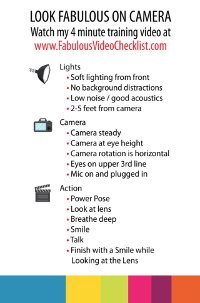
I’m working from Hawaii this week. I had a Zoom call first thing Monday morning from my 10th floor lanai. I really loved the idea of having the Waikiki skyline behind me, but as you can see from the photo below – it looked awful. So I went through my 90 second video makeover checklist and you can see what I ended up with below.

So I went through my 90 second video makeover checklist and you can see what I ended up with below. The background wasn’t nearly as sexy, but I looked great. And don’t worry, I took my classmates on a virtual tour by panning the camera around before class started. When you’re working from Hawaii, you must flaunt it.

Let me cover my 90 second makeover checklist and how I handled each step:
- Soft lighting from front – The backlight was just too bright compared to the light on my face. If I had some massive lights, I could have made myself bright enough to match the background. But I’m in an AirBnb, and that wasn’t an option. So I turned the camera so that the foreground and background were getting the same amount of light.
- Background distractions minimized – This was easy as I just had a blank wall and jalousie windows behind me. Nothing distracting, but I felt like the jalousies helped build that “Hawaii atmosphere.”
- Low noise / good acoustics – Being that I was outside, and there were birds chirping (and I’ll admit there was also road noise and trash trucks) I decided to put on the earbuds from my iPhone. By placing the microphone close to my mouth, my voice becomes much louder than any background noise. I’m not a fan of how earbuds look in a video, but this was a compromise.
- 2-5 feet distance from subject – Easy peasy.
- Camera stabilized with tripod, etc – I started with the laptop on the patio table…
- Camera at eye height – …but the laptop on the table was too low (looking up my nose and featuring my double-chin.) So I wandered the AirBnb and decided my suitcase was the best tool for raising my laptop to the right height.

- Camera rotation is horizontal – It would have been really hard to prop my laptop on it’s side. This bullet is mostly for people using their smartphones.
- Eyes on upper 3rd line – You can see that I tilted the camera down a bit so there’s not too much space above my head.
- Mic on and plugged in – It’s in the earbuds – and I checked in Zoom to make sure it was using the external microphone and not the built-in one.
- Eyeline to camera lens – I was using the Logitech c920, so the camera was above the screen. Whenever I was talking, I was looking at the camera.
The last five steps mainly apply to recorded videos. I was in an hour long class, so I skipped these:
- Wonder Woman pose for 30 seconds
- Breathe deep
- Smile
- Talk
- Stop & Smile
This all took less than 90 seconds. The most time consuming was deciding my luggage was the best tool for raising my laptop.
I also took a few more seconds to try adjusting my webcam to see if I could get that top image to look better. I recently did a video on adjusting a Logitech webcam. But I wasn’t able to come up with a good image.
If you’d like a copy of this 90 second makeover checklist, you can download it now.


Doesn’t look there is any MAC tools at Logitech for camera control just yet. 20181204. Iglasses is pretty good.
Gary – I just updated this article with a link to Logitech Gaming Software, which is how I control my c920 on my Mac: https://support.logitech.com/en_us/software/lgs
Thanks for the tips! Good stuff…. how about in a dark room?
James – I think you’ll need a light! You could increase the brightness with the software, but if the room is dark, you’ll just end up with a lot of grey instead of a lot of black.
Hi, thanks for the great content. Can you suggest some lighting I could purchase to help when I video in my office (not much natural light).
Thanks in advance!!